Showing posts with label star. Show all posts

Tuesday, 14 July 2015

Star Pattern Nails

Hi there you guys!! I love stars and this is a very uniform pattern and I think it's great. I love a bit of order sometimes.

Just all the colours, which I love. I was happy with how uniform I got the stars, that doesn't always happen for me. Yeah there's not much else to say but it's a nice design. I added the 3D stars for fun.

Got my toothpicks and freehanded all the stars, when I was a young'un (still am not gun lie) I figured out how to do nice stars without doing the lines in between which was an achievement back then. 

Yellow: Rimmel - Bee A honey
Green: Barry M - Kiwi
White: Barry M - Cotton
Black: Lovely Me:Ex - Black
Red: Barry M - Carousel
Orange: Essie - Fear Or Desire
Blue: Barry M - Malibu
Purple: Illamasqua - Jo'Mina
Dark Blue: Nails Inc - Baker Street
Pink: Barry M - Miami 
Dark Pink: OPI - Charged Up Cherry
Light Green: Barry M - Greenberry
Dark Purple: OPI - Plum & Get It

Thank you for reading and I hope you have a nice day!! :)

Friday, 27 February 2015

Star-Crossed Nails

Hello!! I've have some downtime recently so I've been trying to get some nail art and general nail stuff done before everything goes insane again. I might have to do mock exams and so much urgh. See my clever title, cause it's literally stars and crosses, I needed something simple to last and this fitted that criteria.

I always like star patterns and the cross pattern is pretty cool. It's very simple but sometimes that's the most effective. I like this colour scheme too, blue and green are 2 of my favourite colours too. The glitter really adds too, it was missing a little je ne sais quoi and the glitter got it.

I freehanded the design with some toothpicks, I'd draw the outlines of the stars and then fill them in. I tried my best to keep the lines straight and while they're a bit wobbly I'm happy with it. For my left hand I did the pattern "inverted" cause I can never truly match.

Red: Barry M - Starlet
Blue: Barry M - Malibu
Green: Barry M - Greenberry
Dark blue: Nails Inc - Baker Street
Olive green: Illamasqua - Melange
Glitter: Barry M - Superdrug Xmas LE 2012 B

Thank you for reading and I hope you have a fantastic day!! :)

Monday, 24 November 2014

Purple Galaxy Nails

Hey there guys!! Lots of purple posts going up recently, coincidental I say. But I do really like purple. I adore galaxy nails and it's been a while since my last one, I thought the purple base would make a pretty cool galaxy.

What can I really say apart from it's your standard galaxy except there are more unconventional colours? But good thing that your standard galaxy looks really sweet, I think the blending was pretty ok to good and I wanted to incorporate a bunch of cool tones in. And glitter, you know I'm all about that glitter. One slightly different thing is the use of silver, my white polish is getting gloopy (it always happens) so silver is a nice alternative, adds to the ethereal feeling (I pretend like I know what I'm talking about).

As most galaxy designs go I used a sponge and went colour by colour sponging. I attempted to create the galaxy pattern even though I don't really know what they are. I dabbed some glitter and used a toothpick for the stars, just lots of little dots.

Base: The Body Shop - A Grape Affair
White: Barry M - Matt White
Silver: w7 - Silver Mirror
Light Blue: Revlon - Dreamer
Dark Blue: Essie - Lots Of Lux
Purples: OPI - My Current Crush and OPI - Plum & Get It
Teal: Essie - Naughty Nautical
Glitter polishes: Rimmel - Disco Ball and Topshop - Razzmatazz

Thank you very much for reading and I hope you have a wonderful day!! :)

Wednesday, 24 September 2014

Nautical Print Nails

Hello there guys!! I was feeling like some nautical nails and so I did some nautical nails. Nautical never disappoint me, they're like textbook cute with a great colour combo and really cute patterns. I really like this one today!! :)

So I was going for different nautical "prints" with hearts, anchors, stars and stripes. I really like that heart print, ever since my Reese and Cyrus Animal Crossing design I have been <3ing heart print, it's so simple but SO CUTE!! I always like anchors so that worked well for me. The duff nail is the star and stripe one but I think it adds to the design; go double accents ya'hear!!
Also Last Friday Night is such a super pretty polish, I totally forgot. It's the perfect subtle, delicate (that blue shimmer though) glitter.

For all the prints I used my toothpicks carefully and the stripes were with the brush of the polish, that's why they a little bit messy (but such are stripes).

Light Blue: Barry M - Sugar Apple
Red: Essie - E-nuff Is E-nuff
Blue: H&M - Blue My Mind
White: Barry M - Matt White
Teal: Barry M - Guava
Glitter: OPI - Last Friday Night


Thank you very much for reading and I hope you have a lovely day!! :)

Thursday, 3 April 2014

Pinwheel Multicoloured Stars

Hi there guys!! I've just edited a mad amount of pictures and now it's just time to write posts. I am tired though, it's pretty late when I write this and I'm excited to chill (to an extent), really I have a ton of work to do (as usual) but let's not think about that. I had good intentions with this design but things ended badly. This goes hand in hand with yesterday'd glitter post, I don't like this design very much.

But I think the design looks much better in pictures. I like the colourful chaos in the pictures, it's fun and contrasting. But in real life it's a mess. We ignore such things though. I wanted to do stars without a black outline and of course that called for mental rainbow and monochrome(ish) stars made up of lines to go with the bar glitter. Yep and that didn't work out so great. I always like bright colours but the execution could've been much better here.

I did a base of white for the stars then got my toothpicks and drew lots of lines for the stars. I really do like some of the black and silver pinwheel stars, they are cool. I think I need to do more pinwheel nails in general, cause they're really cool in general.

Base: OPI - Sea You In Hollywood, Rimmel - Azure, Color Club - Sky High and Nails Inc - Hampstead Court
Red: Essie - E-Nuff Is E-Nuff
Orange: Essie - Fear Or Desire
Light Orange: Rimmel - It's a Scorcher!
Yellow: Rimmel - Sunshine
Mustard: Topshop - Naked
Green: Barry M - Greenberry
Light Green: China Glaze - Re-Fresh Mint
Blue: Barry M - Blueberry Ice Cream
Dark Blue: Nails Inc - Baker Street
Teal: Barry M - Guava
Dark Green: OPI - Jade Is The New Black
Light Purple: Barry M - Prickly Pear 
Pink: The Face Shop - PK105
Light Pink: Barry M - Dragon Fruit
Purple: Illamasqua - Jo'Mina
Black: Rimmel - Black Pearl
Silver: w7 - Silver Mirror
Silver glitter with holographic bits: Revlon - Belle (I thought this polish would help the stars but it didn't, foolish child)
Yep I like to utilise my polishes.

Thanks for reading and I hope you have a nice day!! :)

Sunday, 2 March 2014

Ultimate Cute Food Nail Art

Hi there guys!! New month, more hecticness for me. There'll be less posts probably but we'll see what happens. I'm still mad behind and I haven't been up to date since December, but at least I've got things to post. Like this here design I LOOOOOOVVVVVVVVEEEEEEE it. Finally I've made my way back to the cute food (i.e. my favourite kind of nail art ever) and this might be my favourite. Ever. Like seriously cute food will never get old for me.

I saw this picture in Google images and I did my version and thought I'd go all crazy with the shiny parts. But I didn't but complexity is not for me. Goodness I just love this, it's so freakin' cute!! And the foods are so sweet and yeah I just love it. I feel like it's also quirky which is v me. I used glitter as the sprinkles and I can always handle that.
I have a star biscuit (the rainbow frosting anyone? ;)), a caramel covered banana, a chocolate and strawberry covered ice cream, a cupcake and an iced strawberry. I can't deal with all the food. Just putting it out there that I LOVE food. A LOT. No jokes.

I laid down a white base, and filled in the colour accordingly with ma toothpicks. Black outlining last as well as the faces. Took a while but wasn't too hard and I loved it, so time was worth it. I dabbed on glitter too, that was fun I love glitter. I love a lot of things.

Base: w7 - Salt n Pepper
Black: Lovely Me:Ex - Black
White: Barry M - Matt White and Lovely Me:Ex - White
Rainbow glitter in white base: The Face Shop - Vanilla Sugar Yogurt
Peach: M&S - Sun Glow
Pink: Barry M - Dragon Fruit
Yellow: Rimmel - Sunshine
Brown: Nails Inc - Porchester Square covered by M&S - Sun Glow
Pale Yellow: Ciate - Loop The Loop
Red: OPI - Dutch Tulips
Matte Glitter: The Face Shop - CMX321
Dark Brown: w7 - Brownie
Multi-coloured sprinkle glitter: Barry M - Amethyst (this polish needs more love)
Blue: Barry M - Blueberry Ice Cream
Pale Blue: The Face Shop - BL601
Green: Illamasqua - Nomad

Thank you very much for reading and I hope you have a wonderful day!! :)

Saturday, 11 January 2014

Have a gold star! And a silver one, and a pink one...

Hi there guys!! Simple nail art today, this was the other half of my true new year's manicure. I wanted something simple and to let the bar glitter shine. Haha many will not be keen on letting bar glitter shine :P

I love stars, one of these days I'm going to say "I love stars so I made up a super awesome manicure with them", one of these days... I wanted a simple gold, silver and bronze colour combo but without the bronze. And replaced with pink and white with black and red glitter instead. Oh yeah and gold turned into mustard yellow cause I forgot to put the gold on top of it lol.

This one was v simple, I drew some stars with black and filled them in. Normally I would paint the colours first then the black but I was lazy haha.

Base: Various green polishes and Barry M - Sour Apple
Black: Lovely Me:Ex - Black
Yellow: Topshop - Naked
Silver: Nails Inc - Abbey Road
White: Lovely Me:Ex - White and w7 - Lava Flow
Pink: Barry M - Princess


Thank you for reading and I hope you have a great day!!! :)

Thursday, 12 December 2013

The Psychedelic Stars in the Bright Sky

Hi there guys!! It's nice when things actually work your way, actually I'll link a song that I'm in love with that I feel is relevant and it's an amazing song. Anyway I have some crazy star nail art, cause I love stars and I don't give them enough love.

I love the way stars look, they just look great. I wanted a wavy connected across all the nails kind of look and it was kind of achieved. I also like the pairings of the colours of the stars (well that was wordy). Just a cute little look :)
I was also trying a new polish, which I have to say I was very underwhelmed with, you probably won't be seeing it again as I don't really like it.

Base: Deborah Lippmann - Lady Sings The Blues and Rimmel - Disco Ball
And a wild Deborah Lippmann appears, I promised myself I would never buy a Deborah Lippmann polish cause they are extortionately expensive and I don't think the colours are all that special. But TK Maxx was offering me 4 Deborah Lippmann polishes for £12, 1 Deborah Lippmann polish costs £18 and it's a pretty great deal. But I'm giving the others away as presents cause they don't really tickle my fancy (what a strange phrase). Disco Ball really made the polish look better, I liked the glitter in Lady Sings The Blues (also I like the name of the polish) but it wasn't very apparent and what I liked least was how dark it was. I like dark blue but it was pretty much black and I'm just not a fan, so don't expect to see this one again haha :P
Purple: OPI - My Current Crush
Light Purple: Illamasqua - Jo'Mina
Silver: w7 - Silver Mirror and Nails Inc - Abbey Road
White: Lovely Me:Ex - White and Barry M - Lady
Teal: Barry M - Guava
Blue: Rimmel - Azure Blue
Green: Rimmel - Block Your Green!
Light Green: Barry M - Greenberry


Thank you for reading and I hope you have a lovely day!! :)

Wednesday, 4 September 2013

31DC2013: Day 4 - Green Nails

Hi there guys!! Today was a day I went in not knowing what I wanted to do, sometimes these are the best days (or the worst) as anything can come to you. I painted my nails with Barry M Greenberry and went from there.

I decided I wanted some kind of geometric thing on my accent and thumb so I drew some lines. I thought of those studs that look nice near your cuticle so angular hearts came from that. The middle finger hearts ended up a bit too big than I wanted it to be but then it ended up being perfect for when I saw a star on my thumb and used pink to highlight it. I drew another heart on my middle finger to connect the pink from my thumb into the mani. It was like filling in the gaps with all the colours, I had fun.
After I was done I was completely satisfied, I think this is mosaic-esque and all the triangles there are my favourites. I think is super cool and edgy (which is my aim cause I'm pretty much the opposite of edgy).

By the way I do hope to get some studs one of these days, they look awesome. After filling in the spaces I would go over the outline again with the black pen to make is crisper. I had a kind of plan going into this but I scrapped it (coincidentally like last year, but last year's was a mess). It was simply to add some bows, it's quite clear why I didn't do this, too simplistic (no offence to bows, they're cute). Whilst I probably would've gone crazy with other elements, I'm loving the design I created instead.

Blue Green: Barry M - Greenberry
Light Green: China Glaze - Re-Fresh Mint
Neon Green: China Glaze - I'm With The Lifeguard
Dark Green: OPI - Jade Is The New Black
Pink Foil: Barry M - Boots Xmas LE2012 B
Medium Pink: Orly - Basket Case
Rose Pink: OPI - Japanese Rose Garden
Red-y Pink: OPI - Charged Up Cherry
Neon Pink: Nails Inc - Notting Hill Gate
Dark Pink: Color Club - Wing Fling
Black: Lovely Me:Ex - Black
White base for the neons and dark pink: Lovely Me:Ex - White


Thank you very much for reading and I hope you have a great day!!! :)

Friday, 16 August 2013

Rainbow Star Nail Art

Hello!! I mentioned 2 posts ago that I did some nail art over The Face Shop - Vanilla Sugar Yogurt 01 that I loved and I have it here today. It's pretty sweet :)

 :D I really like it :D I was a bit meh for a while until the moment I matted it (Rimmel - Matte Finish) *Hallelujah chorus* All the colours were popping and the glitter in the polish was standing out. It was a beautiful moment. When everyone was posting their 4th of July manis I was smitten by all the stars. I love stars but I feel like I neglect and forget them sometimes. Stars are awesome. And look how fun this design is because of them!! :)

When painting the stars I didn't mind if the star wasn't completely opaque cause then the glitter could come through. I freehanded the stars, I first drew the outline of the star then filled it in with the polish. I'm proud of my stars cause they're quite nice and it was a non-dominant hand effort. 

Base: Barry M - Matt White (2 coats) and The Face Shop - Vanilla Sugar Yogurt 01 (3 thin coats)
Red: Essie - E-Nuff Is E-Nuff
Orange: Essie - Fear Or Desire
Yellow: Barry M - Lemon Ice Cream
Green: China Glaze - I'm With The Lifeguard
Blue: Color Club - Sky High
Purple: OPI - Plum And Get It
Black: Lovely Me:Ex - Black

I have another somewhat similar star design that I really like that came from a fail, proves stars are awesome :P Thanks for reading and have a great day!! :)

Thursday, 28 March 2013

Cabbie! (with some doodles)

Hi there guys! Hope everyone is happy today, as why not we all deserve to be :) Now from the title you may be thinking "Cabbie? What is that, taxi driver nail art?". That is where you're probably mistaken :P I have an obsession with the show Victorious (I'm a big kid, that is also literal), and Cabbie is the sole reason why I LOVE that show. The other couples hold no candles compared to Cabbie. Cabbie is Cat and Robbie, and yeah hopeless romantic here but they are SO CUTE. I can't cope. I don't think my nail art does them justice but it's not too bad it's quite cute.

The red cat with the glasses is the main focus point here. A cat cause of Cat, red cause of her hair and the glasses for Robbie's glasses. Pink and blue also seem to their colours, I could've done more Victorious stuff in this manicure but I was tired :( So I added some random doodles which I ended up quite liking. I put topcoat over the cat and that got messed up (clearly I'm doing something wrong) but I fixed it up, also I didn't like the cat in real life but in pictures it looks way better and I'll take it.
Pink: The Face Shop - PK501
Foil Pink: Barry M - Pink Foil (Boots Xmas LE 2012 B)
Blue: Essie - Bikini So Teeny
Light Blue: The Face Shop - BL601
Red: OPI - Dutch Tulips
Black: Lovely Me:Ex - Black
White: Lovely Me:Ex - White
Pk105 looked brighter this time I had it on which is always good in my books. Bikini So Teeny was also showing it's shimmer! I did like the way the pinks and blues went together.

I wanted Cabbie together since the 4th episode of Victorious, "The Birthweek Song" when Robbie invites Cat to his grandmother's house. Clearly my favourite episode with them (ok there are a few) is "One Thousand Berry Balls", I cry tears of cuteness. The sad thing is Victorious got cancelled so Cabbie will never officially be together :'( That really was the only thing I cared about in the show, at least finish the season properly before cancelling it :'( I hate when TV programmes do that, end a show without a proper ending. But One Thousand Berry Balls will have to do :/

Thank you very much for reading about my (potentially creepy to you) Victorious obsession :P Have a great day!

Sunday, 10 March 2013

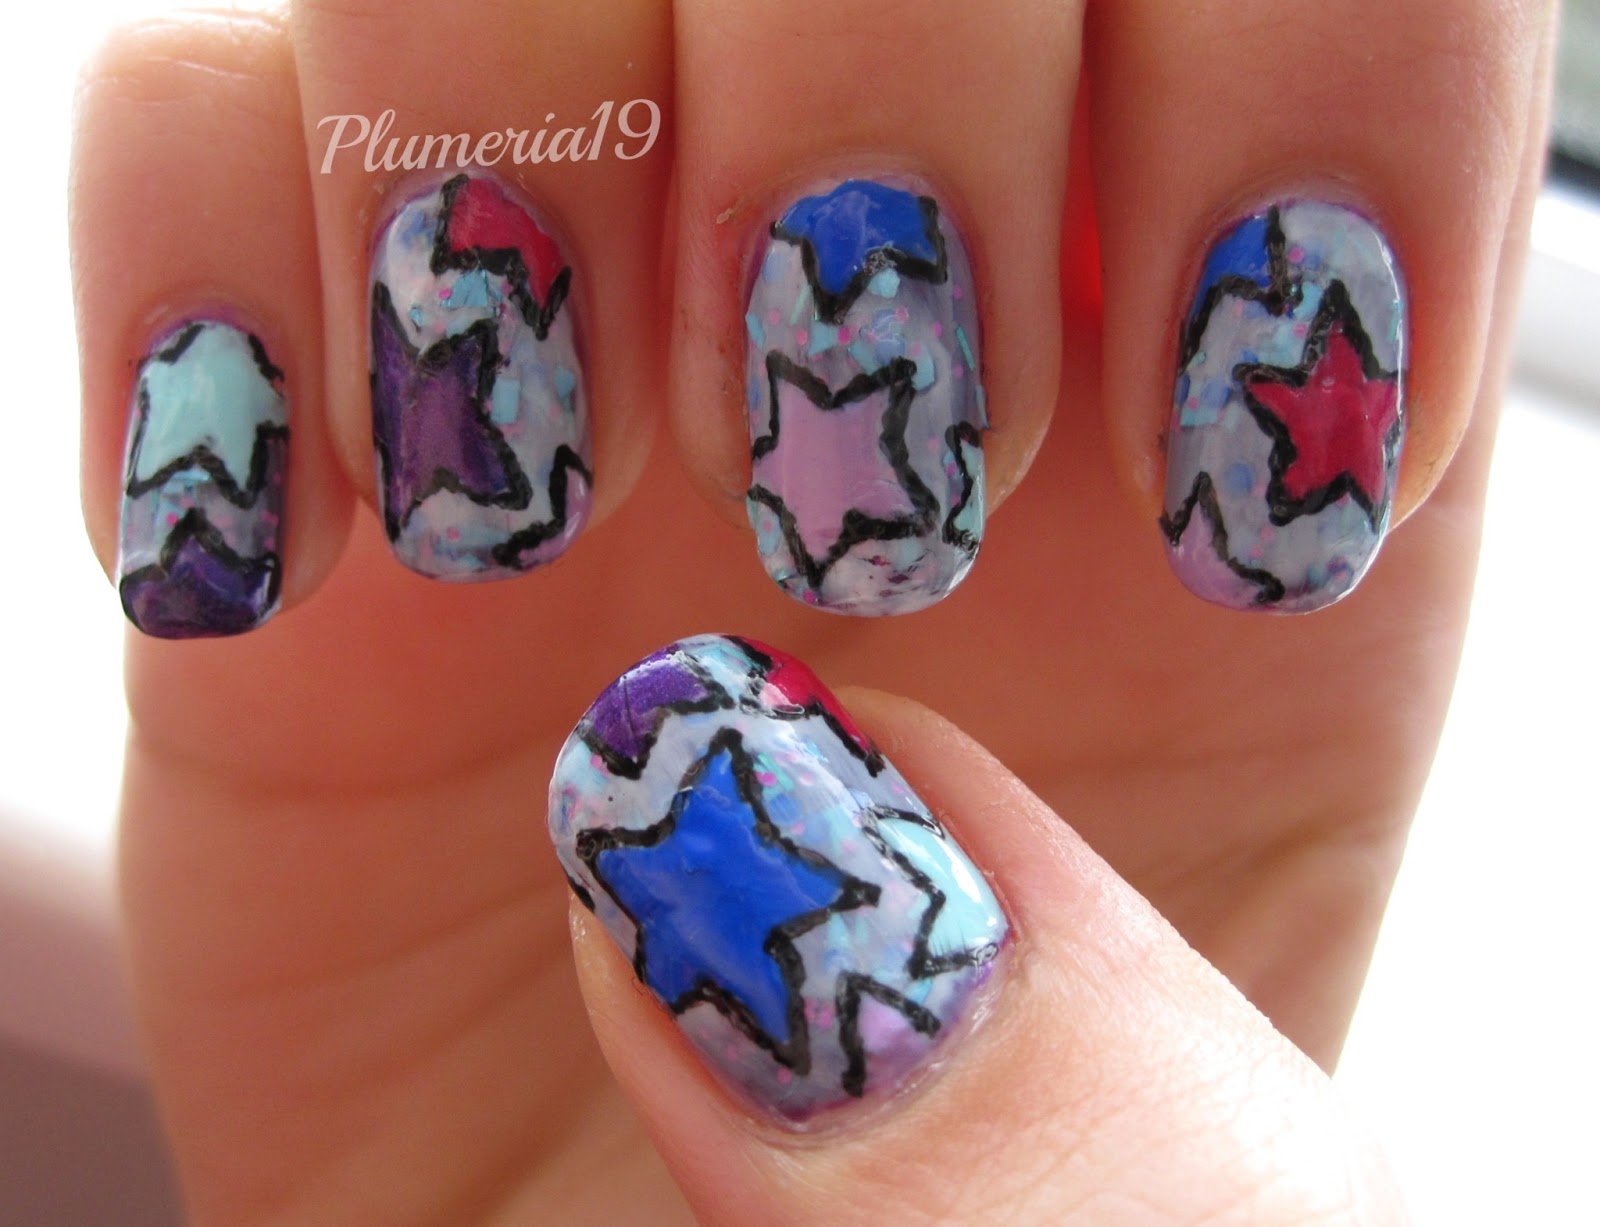
Freak Out! Stars

Hi there guys!!! I hope you're enjoying this fine Sunday evening, which will hopefully lead into a wonderful new week.

This post should also be titled "How nail fails can be saved", cause really. It was bad. I had an idea to do a glitter gradient "inspired" by Models Own - Freak Out!, but I think I was too lazy to do that and I just told myself, don't just put Freak Out! over plain nails. You can probably guess what I did, we all know I can't listen to myself.
It escalated to the point where I jelly sandwiched the mani and it was bad, very bad. I'm not going to describe how bad it looked cause it was bad. I gave myself a rule not to jelly with a different base and jelly colour. ...Um...Yeah...I did that. But I'm glad I didn't freak out (I'm a clever one aren't I :P) and give up, cause I really love this nail art.

I don't know why I don't do more stars cause I love stars. I freehanded those bad boys (literally have never used that phrase before in my entire life), and I'm so happy with how they turned out. It's really the colour scheme I love, it's "inspired" by Freak Out!. I think this is such a party manicure, ok maybe more kids party manicure but I love that vibe.
Base: OPI - Plum And Get It, Models Own - Freak Out! and No7 - Snowflake (DON'T DO IT, PLEASE)
Purple: OPI - Plum And Get It
Light Purple: Barry M - Berry Ice Cream
Blue: Nails Inc - Baker Street
Pale Blue: The Face Shop - GR501
Pink: Per Una - Fuchsia (no name)
I like Freak Out! but I don't love it, I show it here a lot but that doesn't mean I love it. I find the formula a bit tricky, everything migrates to the tips. I also don't like shards (they poke out and annoy me) and it smells really bad. But it's nice enough that I use it, no where near being a favourite though.

Had to edit out a wee bit of a cut, but it's still ok :)
Moral of the story: Don't jelly with a different colour to the base, and always persist after a nail fail cause it could turn out right!!

Thank you very much for reading and have a lovely day!!!! :)

Monday, 31 December 2012

Glitter Gradient Stars (for New Year's Eve)

Hi guys, happy new year's eve! This year has just blasted by, I'm definitely not the only one to think that. I had a really good year this year and I can't wait for next year. I have so many nail art ideas I can't wait :) I haven't really thought about a new year's design cause I've been absorbed in Christmas (and I was happily absorbed). I've thought about this design and thought it would be appropriate for new year's. But let me tell you, it wasn't easy...

After all the effort though, I'm a fan. I haven't gone into my love of stars before but I think they're fascinating and beautiful. I matted this design with the Rimmel Matte Finish topcoat. I haven't done a star design before surprisingly, I thought of this and was reminded of Chalkboard Nails's beautiful star design, her's is amazing. I knew mine would not be of that calibre but I could do a half baked attempt. She made a lovely tutorial too but I couldn't do it. I didn't have the essential equipment for the design so I searched around the house for things that could be used.
You find some crazy stuff when searching around the house, I hoping for some star stickers to make my job easier but no cigar (I've never understood that expression :/). I found quite a lot stickers (and a comb that says "I love milk" which was SO cute) and actually I found 1 tiny star sticker that wasn't going to work. But 2 days ago I was cleaning out my desk and I found star confetti, how convenient!!! My thumb has the prototype attempt, I stuck some tape to the back of the star and painted, but the star was flat and my nail is rounded so it failed a bit and I just freehanded the stars on that nail. Below is how I got the stars on my other nails.

How to achieve stenciled stars the difficult way (no pictures, maybe in the future but probably not as this design was so tedious with my method)
1. Paint your base
2. Get some sellotape and stick the confetti stars on (the more stars packed on the piece of tape the easier to cut out)
3. Cut around the star and peel the star shaped sellotape off (be careful as the tape could rip and rage ensues)
4. Stick the star piece of tape on your nail (don't press it on too hard or it will take the base off) and repeat step 3 for however many stars you want on your nails
5. Using an opaque polish (I used Rimmel - Black Pearl) paint over the nail and the tape
6. Let the polish dry a tiny bit and start peeling the tape off
7. Fix imperfections with your chosen tool
8. Have a pretty funky star design on your nails

Step 4 with pressing the tape too hard and having the base come off happened to me. I just re-patched it up late though. I think my middle finger came out best. Sorry for not cleaning up properly. I was fed up. Just use Chalkboard Nails's tutorial, it's simpler, prettier and less tedious. Peeling the tape off the confetti stars was hard -_-

This is the glitter gradient I did before the stars, I took pictures in case the stars failed so I would still have some pictures. I really like it, glitter gradients are easy.
Pink nail: Barry M - Pink Foil (base), Barry M - Amethyst, Butter LONDON - Shambolic and Barry M - Hologram Hexograms
Blue nail: Essie - Bikini So Teeny (base), Barry M - Silver Glitter, OPI - I Lily Love You and Models Own - Freak Out!
Purple: Barry M - Berry Ice Cream (base), OPI - Last Friday Night, Barry M - Aqua Glitter, Revlon - Radiant and China Glaze - Luxe and Lush
I was busting out those Barry M's, but I love those polishes. The brush for Freak Out! is so wonky, I have also realised my strong dislike for shards, the more I look at them, the more I don't like them. They don't look nice. For the stars I thought I could've done in the outlining in silver or something, but it's too late for these things now. But I think the design is very appropriate for new year's due to the glitter and the stars. I don't know what's new year's eve appropriate in all honesty, I thought a normal new year's eve is sitting at home watching tv or something. Apparently not. I didn't even realise what NYE stood for til yesterday (-_- as you can tell I'm slow).

I haven't done one of these rambly posts for a while. It's refreshing, I love to ramble. Well done if you actually read something from this post (but y'know I think you should, it's a pretty good read :P). Thank you so much for reading, I hope you have a lovely new year's eve and see you in 2013!!!! :D