Showing posts with label nail art. Show all posts

Monday, 5 September 2016

Blue Distressed Grid Nails

Hi there everyone, if anyone is still here cause I know I've been away for quite a while. Can't say I'll be back much either though. To explain my absence basically I just stopped doing nail art cause I got super into knitting. They don't contradict each other so to speak, like I can have nice nails and knit but I've just kind of invested all my time into knitting (and been loving it). I still like nail art but I've moved on, you know the natural progression from nail art to knitting hahaha.
It's bad that I didn't say I moved away from the blog because of A levels haha. But yeah I got my results and I did pretty well, 3 A's and I've got into uni so this is why I think I will be retiring this blog. I do have one more nail art look before I go but I think it's time to say goodbye. I've had such a good time writing this blog, the point was always to document the creativity cause I've always loved art and while I've felt behind so frequently on this blog it's always been a good time. And while it's been small the feedback I received from anybody always made my day and I've met such lovely people in the nail community so thank you for even reading a few words or taking some time to look at my nail art.
I don't think I'll start a knitting blog, I think I've had my share of blogging but I might start an instagram cause I love pretty things really. I might put up the odd bit of nail art there. I've knitted like a maniac since Christmas and I moved away from the blog, I have a real affinity for hats, I love knitting hats, I don't even know why cause I look terrible in hats but that's where I'm at now. Anyway after that huge explanation I'll get into the nail art, which I obviously did a while ago. I have been doing nail art but it's mostly geometric and I haven't been bothering to photograph (and my cuticles have been a mess haha).

It's been so long since I've done this, I can't remember how to do this anymore. I saw this on someone's instagram but honestly I cannot remember. But they did it in warm colours. I think it's pretty rad, love a bit of distressed and geometric is always so clean. The glitter makes it more clean too.

Trying to keep the same format as before, even though it's not gonna be for long. You know the distressed nails procedure, wipe most the polish of the brush and swipe. Got my toothpick and drew the grid on top.

This is hilarious cause I cannot remember at all what was used so I'm gonna guess.
Blues and purples: Barry M - Sugar Apple, Rimmel - Disco Ball, M&S - Light Mix, OPI - Plum & Get It and I don't think I can guess anymore haha
Black: Rimmel - Black Pearl

I hope you've all been doing well these few months and you've been keeping well, I hope you guys have a great day and until my next and last post!! :')

Monday, 18 January 2016

Geometric Metallic Stripe Nails

Hello there guys!! I hope you're January is going sweet. I'm desperately trying to motivate myself to do work. We'll get there. So today I have a nail art look, I'm not the happiest with this, I think with a different colour scheme it would've been way better. I should've just enjoyed the glitter nails I was rocking with.

So there's a super glittery base and some metallic stripes. I really like the stripes but I think the whole thing looks very dull because of the colours. It had potential.

This is a simple one, where I just painted lines and hoped that they weren't too lopsided. That's really the extent of it.

Base: M&S - Peacock, Barry M - Aqua Glitter, OPI - Polka.com and Revlon - Belle
Silver: w7 - Silver Mirror
Pink: Barry M - Boots Xmas LE 2012 B

Thank you for reading and I hope you have a nice day!! :)

Saturday, 9 January 2016

Reindeer Fair Isle Nails

Hiya!! This is um a leftover Christmas design, but I still think it's winter appropriate so we're still all good. Fair Isle designs are so nice, I have a jumper with a fair isle design. Hey it's more nail art!! What this blog is about!!

So you can definitely see a Christmas colour scheme, well you can't have enough Christmas. The main shapes of this design are just dots and asterisks and hearts. So it was really easy to paint but still looks pretty complex. The reindeer were definitely the best part of this design, but yeah overall I really like this design, repeating patterns is fun.
Oh yeah and matteing everything, but I had issues with my matte topcoat. Don't know why but it leaves white chunks on my nail art which is pretty terrible when you've spent ages on a design. Thankfully I was able to remove a lot of them but it really jeopardises a design cause the white bits get stuck in the topcoat then everything can get wrecked. You have to tread carefully.

Again this one was very simple, got my peach base then I got my toothpicks and painted the various designs. I worked from top to bottom (cause that makes sense) and did dots and all the other stuff. i'm so good at describing.

Base: M&S - Sun Glow
Green: Barry M - Kiwi
Red: Seventeen - Dark Heart (or something like it, all reds are the same)
Light Green: Illamasqua - Nomad
Blue: The Face Shop - GR501
Light Red: OPI - Jinx

Thank you for reading and I hope you have a great day!! :)

Friday, 1 January 2016

Pink Glitter Cherry Blossom Nail Art

Hey guys, Happy New Year!! I'm sure we're confused where 2015 went but 2016 is here and I think it's a good thing for a metaphorical new start :) Please tell me we're all watching the Sherlock new year special today.
I actually did look this ages ago, before any of the Christmas nail art but I think me being behind is a given now. Just really enjoying this holiday while I can and before my life gets mental again. I think we've all been busy bees (lol at this phrase that I've never used before). My plan was to post a load during December and that didn't even happen haha. I forgot to mention that during December I had a load of choir things and one of them was broadcast on TV (where I looked like the boredest person alive lol) and I did a reading on the radio (now that wasn't too bad :P). Anyway, cherry blossom.

I think cherry blossom designs are always nice, I think the all pink thing was a mistake on my part but I think the look still pulls through. I'm still on a total matte kick and thankfully my matte topcoat hadn't turned on me (but it's early days yet, I'll tell you what I mean in a future post). The glitter totally helped this look out, it adds magic and that and a windswept effect. 

I started with the black branches and kind of just dragged the toothpick and hoped for an arty effect. My branches could've been done better but we go with it. Then I added the flowers and did a dot and dragged the black to the centre. I was trying to do gradient flowers but it didn't really work, it works better once I point it out but you wouldn't notice it otherwise. 

Base: Seventeen - Pink Lemonade
Black: Rimmel - Black Pearl
Light Purple: Seventeen - Parma Violet
Purple: Orly - Frolic
Glitter: Barry M - Fairy Lights and Maybelline - Bouquet

Thank you for reading and I hope you have a fab day!! :)

Monday, 28 December 2015

Robin Red Breast Nail Art

Hey there guys!! I hope you had an amazing Christmas if you celebrated :) I got the loveliest gifts from people and I appreciate it so much. So I have some Christmassy nail art but it's more winter, it's why I felt ok holding these looks back (also been knitting up a storm, everything has been deprioritised, not a word but you know what I mean). Robins are so sweet, I'm surprised I've never done Robin nail art before but I'm glad I can still paint new things after all these years.

I'm still on a complete matte kick. For these robins I wanted to do a different style for every nail and I just about did it. So different colours and patterns for the belly and different beaks. It was fun. I love the little Santa hat on my pinky. I feel like the soft glitter in the back is perfect for falling snow, gotta give all your polish love. 

For these birds I tended to start with the belly then the brown/white and then add all the details with of course toothpicks. Generally proportions were ok, except on my index finger where the head was way too small for the body but managed to fix that by bringing the legs higher weirdly enough. 

Base: Barry M - Blue Moon and OPI - Pirouette My Whistle
Brown: Paris Collection - Mauve Melody
Dark Brown: w7 - Brownie
Black: Rimmel - Black Pearl
White: Barry M - Cotton
Red: M&S - Poppy
Light Red: Barry M - Carousel
Copper: Paris Collection - Copper Topper
Light Brown: Paris Collection - Brown Beaute
Pink: Barry M - Miami
Light Pink: Barry M - Dragon Fruit
Dark Pink: OPI - Charged Up Cherry
Purple: Orly - Frolic and Barry M - Socialite
Silver: w7 - Silver Mirror

Thank you very much for reading and I hope you have great holiday!! :)

Wednesday, 23 December 2015

Red Glam Snowflake Nails

Hey there guys, oops about the posts. It's 2 days before Christmas and we're getting our first Christmas nail art look :/ I've been busy, this is my standard thing now. I'm in charge of the Christmas ballot meaning I have to wrap nearly 50 presents and um I haven't done that yet. Also I've really taken to knitting, I've knitted 2 scarves in 4 days, I've basically binge knitted like 8 hours a day. I'm not good with balance, I've been knitting so much I haven't been playing Pokemon and trust me that's saying something . Anyway I always do snowflake nail art every year so this is what we're getting. Though I do think this is my best one yet.

So I think a red base is classy. I've also been obsessed with matte again but I'll talk about the demerits of that even though I do think matte is totally worth it. So they're just snowflakes but they're neater than ever before and ALL THE GLITTER. I think I should've done one less coat of the base glitter to let the red come through but these are minor things.
I loved wearing this look, oh yeah with matte the manicure chips a million times more easily and my index chipped clean off and I had to redo it creating the tons of bubbles cause I didn't give it enough time to dry -_- I also accidentally used a different red from the other nails, but it proves all reds are the same haha.

So after my glitter base I got my toothpick and did an uneven X then did a line through it. Add the small lines and you have snowflakes, I'm glad I did one per nail basically cause it's so much less crowded. Then I did blobs for snow then I added all the big chunky glitter for glam and glitter, you can't have enough glitter.

Red: Seventeen - Dark Heart (and M&S - Poppy for my index haha)
Gold Glitter: Seventeen - Winter Coat
White: Barry M - Cotton
Chunky Glitter: Illamasqua - Blizzard, Barry M - Hologram Hexograms and Barry M - Starlight

Thank you very much for reading and I hope you have a great time prepping for Christmas!!

Sunday, 13 December 2015

Pastel Jelly Checkered Nails

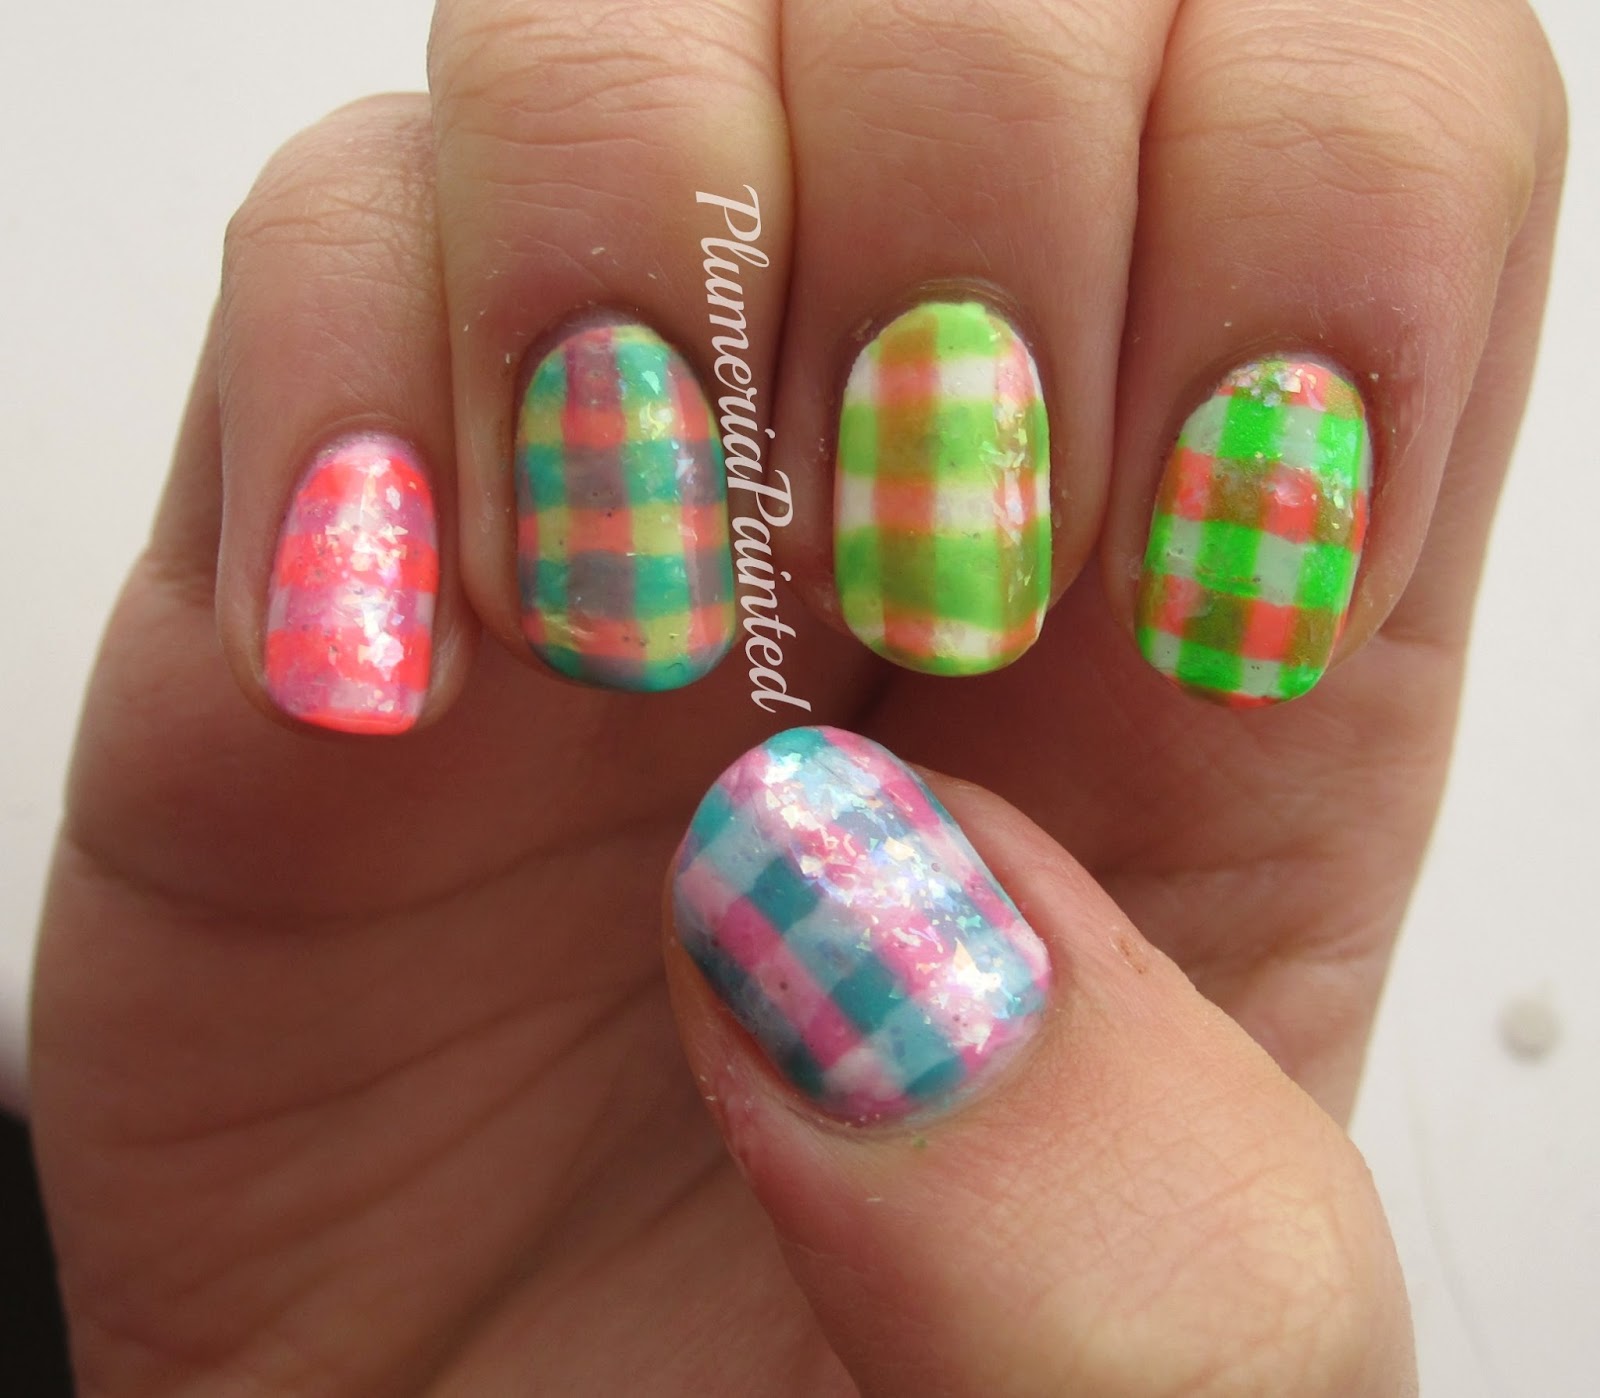
Hey there guise, I have some nail art today, unfortunately while I have done Christmas nail art it might take a while before it gets here as I'm behind. This is an expected thing now. I'm happy with the Christmas nail art I've currently done so I'm excited to show you. But today's nail art is still fun, I got 2 jelly polishes and made me want to do a checkered design as jellies show through really well.

Pink and green are really cute together, and I like it all together. Checkered patterns are so easy and they look so cute, it's after I did my Kanga and Roo design I want to do more checked designs, they're a great base.

So after the base you try your best to space the lines evenly and in a straight line. I'm pleased with my attempt, sure there are some lines that aren't perfectly straight or equal, but that's the charm of it. Otherwise I think it's pretty good, this is freehand remember with the nail polish brushes so I don't think it's half bad. 

Cremes
Pink: Barry M - Dragon Fruit
Green: Etude House - No. 86
White: Barry M - Cotton
Mint Green: Barry M - Pole Position
Jellies
Pink: Seventeen - Pink Lemonade
Dark Pink: Etude House - No. 60
Green: Seventeen - Lime 'Em Up
Dark Green: China Glaze - I'm With The Lifeguard
Blue: Topshop - Green Room
White: No. 7 - Snowflake
Glitter: M&S - Light Mix
I love how all my jellies are becoming useful now, it's time for jelly sandwiches to come back!!

Thank you for reading and I hope you have a lovely day!! :)

Friday, 20 November 2015

Who's that Pokémon? Slowpoke!

Hiya guys!! I hope you're having a good life, I am, I've had this personality adjustment where I don't care about stupid things that don't matter and life becomes amazing!! My university applications have been sent off too so that's a waiting game.
So this manicure was my birthday manicure, I've become a pokémon lover (at the tender age of 17 lol) and I'm currently trying to complete the Pokedex and it's quite the challenge. Also I'm trying to do it with Wondertrade which if you've wondertraded you know it's a mixed bag. Though I've nearly got a full bow of shiny pokemon from it so I say it's worth it. Also I picked Slowpoke for this mani cause Slowpoke is so cute and I have a Slowbro now and I love it. Also side note: sorry about my cuticles!!

So I have a wee Slowpoke with a blue gradient with the big bombastic glitter. It looks better in real life trust me. My lighting is going down and my cuticles are dying lol. I'm happy with that Slowpoke but thankfully it's a pretty easy one to paint. I thought my gradient was done well too cause I did the layers and stuff and I love subtle magical glitter. And then big as glitter (leaving bubbles but you can't win everything haha).

I did the gradient with a sponge and yeah I did it layer by layer, I had the patience. Then slapped the glitter on. For Slowpoke, I started with the pink base and then the yellow mouth with some toothpicks and did the details one by one including the black outline. It was a good shape to paint, it's nice when it can look cool but still be simple to paint.

Pink: Barry M - Miami (I became unsure about this pink cause it was quite dark but it was only in certain lighting)
Yellow: Ciate - Loop the Loop
White: Barry M - Cotton
Black: Rimmel - Black Pearl
Red: Seventeen - Dark Heart
Blue: Barry M - Malibu
Light Blue: Nails Inc - The Tide is High
Subtle Glitter: OPI - Last Friday Night
Chunky Glitter: Etude House - No. 346

Thank you for reading and I hope you have a fantastic day!!

Tuesday, 17 November 2015

Cut-out herringbone green ombré nails

Hello there!! I apologise if in future posts the state of my cuticles goes majorly downhill. My cuticles and the winter don't go together, my cuticles seriously protest. Anyway I have nail art as herringbone is really cool. It's been a while since I've had an ombre here too (though that more because I'm not the biggest fan) but the outcome is this crazy design.

I was meant to have a colour scheme but then it didn't happen and I should've had one. Also the colours you're seeing on my thumb is the result of some weird as chemical reactions. Forgot that Rimmel Block Your Green! reacts weirdly with other polishes since I haven't used it in a while. The colours on my thumb were actually blue, pinky purple and purple. Who knows what happened?
I went for a rainbow thing on my other nails and I quite like it. Though the green was not a good base. should've ombred the whole thing at that rate. So I left out the herringbone gaps and I really like it. No regrets about the glitter.

So as usual this was all freehand, I had no way of judging the spaces but I think I did pretty good with the spacing and straightness of lines. So toothpick and trapeziums.

Green ombre (lightest to darkest): Barry M - Pole Position, Barry M - Mint Green, Barry M - Greenberry, Barry M - Kiwi and Rimmel - Block Your Green! (the culprit)
Glitter: Revlon - Belle (the other culprit) and Rimmel - Disco Ball
Thumb (left to right): Barry M - Malibu, Orly - Frolic and Illamasqua - Jo'Mina
Index: Barry M - Miami, OPI - Charged Up Cherry and M&S - Sun Glow
Middle: Rimmel - It's a Scorcher!, Essie - Fear Or Desire and Rimmel - Bee A Honey
Ring: Barry M - Guava, H&M - Blue My Mind and Barry M - Berry Ice Cream
Pinky: Orly - Frolic (cause you wouldn't be able to tell it's the middle colour on my thumb) and OPI - Plum & Get It

Thank you for reading and I hope you have a great day!! :)

Friday, 13 November 2015

Fox Print Nail Art

Hey there guys!! I hope you're doing sweet, I'm alright just super tired lol. Was my birthday over the weekend so that was some nice gatherings and I have new polish which I've v excited about that. So I love today's design and I think it's absolutely perfect for Autumn.

It's your neutral base with a fox print but I just love the uniformity of the foxes and the colour!! And how cute they are!! Also I'm pretty proud that I managed to basically get them all the same. It's so simple but I love the way it works :3

So I started with the white beard bit and positioned them polka dot style. Then the orange bit with a different toothpick and then the positioning of eyes and nose. The white in the eyes really bring everything to life.

Beige: Nails Inc - Sao Paulo Streets (such a slick colour)
Orange: Barry M - Carousel (which is actually red)
White: Barry M - Cotton
Black: Rimmel - Black Pearl

Thank you very much for reading and I hope you have a really nice day!! :)

Monday, 9 November 2015

Dripping Galaxy Nail Art

Hey there guys!! November time and it's nearly Christmas!! I love Christmas so much, I can't wait. It's nearly my birthday and things are nice. Until exams begin, might have to yolo that cause I'm not prepared. I don't like how schools expect you to be smart 2 months into term, it's not gonna happen.
Anyway today I have the nail art I wore for my school's formal (or "prom"), I went with this cause it was really blingy and rad. Obviously it matched my dress which was cobalt blue and one shoulder and flowy dresses are so fun. It was a fun night but not gonna lie I'm glad it's over so we can all move on with our lives hahahaha. I also did quite a few peoples' nails for it too which was a really sweet experience :)

I'm going with a different pose as the design was the other way round. I do prefer the other way as it's facing me but I thought it was the kind of situation to show off your nails. This is of course inspired by Coewless Nail Blog, her nails are totally insane. I did a colour scheme to match my dress and I love galaxy designs and the dripping thing looks so cool!! So I had fun with this design.

Ok this design took a while, my best friend came to visit me so I could do her nails and she witnessed me painting this design and she realised the commitment I have to my nails lol. So I freehanded the drips with the brush of the polish. Then the "fun" part, broke off tiny bits of sponge and dabbed colours on. There were a lot of colours and took a long time. I like with galaxies you can see the design slowly come together. I painted the stars with a toothpick and then I went mawd with the glitter. Also I had both hands matching for once and that's weird for me but I feel it took longer in a way.

I liked my thumb very much
Blue: H&M - Blue My Mind
White: Barry M - Cotton
Big Hex Glitter: Barry M - Hologram Hexograms (an old favourite)
Purples: Illamasqua - Jo'Mina, Essie - Lilacism, Illamasqua - Seance and OPI - Plum & Get It
Greens: Illamasqua - Melange and Barry M - Pole Position
Glitter Polishes: Topshop - Razzmatazz and Illamasqua - Blizzard (an essential for this)
Other Blues: OPI - Get Your Number, Essie - Bikini So Teeny and Essie - Lots Of Lux
There was maybe more and I could've been wrong, seriously I just had a ton of polish lined up ready to be dabbed.

Thank you very much for reading and I hope you have a great day!! :)

Friday, 30 October 2015

Neon brushstrokes + tribal nail art

Hey there guys!! We're nearing November and made it through October alive. I had my formal (or "prom") last week and that was fun and that was my last crazy event and I'm enjoying the week off school I've been blessed with. Meaning I did nothing productive lol. Need to sort that. I think November'll be nice. I know it's Halloween time but let's be real Halloween is one day of rubbishness, I have no nail art for that. Also I have nail art I'd prefer to do. Like this little design that was pretty rad, I love neons.

So I used the distressed thing but with neons and since neons are sheer it went well and contrasted that with a jet black geometric design and it's sweet if I do say so myself. It's so striking and I love that. Also I love triangles, fun fact.

So we know how brushstrokes go down with the wiping off all the polish from the brush and going with that. Then I got my toothpick and painted the black pattern, I just went with random designs there's no real correlation. I try my best to do freehand straight lines, I think I've got quite good at it over the years. Of course they're not ruler straight but we do the best we can :)

White: Barry M - Cotton
Black: Rimmel - Black Pearl
Pink: Nails Inc - Notting Hill Gate
Yellow: American Apparel - Neon Yellow
Orange: Models Own - Beach Party
Purple: Orly - Frolic
Green: China Glaze - I'm With The Lifeguard

Thanks for reading and I hope you have a great day!! :)

Tuesday, 27 October 2015

Pink blossoms + blue leaves nail art

Hi guise!! I find it hard to differentiate between floral designs in the title but well they are pretty similar haha. This design was inspired by Lacquerstyle cause sometimes a girl needs some simple stylish floral nail art in her life. Also I'm not great at florals, well it's hit or miss. Actually I do think this one was in between but it was nice to wear.

I wasn't happy (well not unhappy but neutral), so I slammed a load of glitter on top to distract. I think it works but then I just love glitter (if you learn one thing about me). Like I think the design is nice enough but that's about it. Nothing special, the colours just about come together in the design.

This was an all toothpick design, I tried to be loose and artsy but sometimes that doesn't work out for me haha. I think I did ok with spacing and not putting too many flowers on a nail?

Purple: Barry M - Prickly Pear 
Pinks: Barry M - Fuchsia and Barry M - Boots LE 2012 B
Green: Illamasqua - Melange
Blue: H&M - Blue My Mind
Glitter: M&S - Light Mix and Rimmel - Disco Ball

Thank you for reading and I hope you have a great day!! :)

Sunday, 25 October 2015

Kanga and Roo Nails

Hey there folks, hope you guys have been good. October's been busy but not as crazy as I thought it would be. Though exams will come up and I will stop being happy lol. Well my school's Autumn concert happened and that was so so nice, also I passed my driving test woo. I am now unleashed onto the roads, we should all be scared hahaha. Today I have Kanga and Roo nails cause I think everyone loves Winnie the Pooh right? It was time to do another one, there's only a few characters I haven't put into nail art yet.

Crazily enough I've never done checkered nails before, I really like the look of them. They were a good pattern for the base and not difficult to do. I'm very happy with Kanga, not so much Roo but it's still good enough for me haha. I've just realised how stupid I am as I type the labels, only now do I realise that when you put Kanga and Roo together it makes kangaroo -_- wow.

I liked when painting the checkered pattern I could be a bit more rough cause I wasn't going for perfectly straight lines with this design. I used the brush of the polish for that then used toothpicks for the teal. Thankfully the brown was opaque to just paint that first (sometimes with a toothpick, sometimes with the brush), then all the details were done with toothpicks. Turns out Roo's face was harder to paint than expected haha.

Brown: Paris Collection - Mauve Melody
Black: Lovely Me:Ex - Black
Peach: Paris Collection - Brown Beaute
Blue: Barry M - Blueberry Ice Cream
Yellow: Ciate - Loop the Loop
Purple: Illamasqua - Jo'Mina
Teal: Essie - Naughty Nautical

Thank you for reading and I hope you have a nice day!! :)

Wednesday, 21 October 2015

Colourful half triangles + Pink glitter nails

Hey there!! Hope you're having a good day and life is being cool with you right now. I now it can be overwhelming, I've been there, done that and there's a chance I'm going back cause I do A levels haha but not really. Today I have a sweet mani cause I love geometric patterns, I was once again inspired by Base Coat Top Coat but different colour scheme. Was in a bit of a creative slump, let's hope I get out haha.

I really really liked this look cause it's really cool, I love uniformity. I was going to do a full design but those 3 nails took ages so I was like "Ok that's enough" and I like accents so it all works out. I love the kind of grid pattern the spaces in between the triangles left. I wasn't sure of the rainbow triangles but I like the way it looks. The more colours the better right?

I got my toothpicks and did the little triangles one by one, so as you can imagine is why it all took so long. Like it's not perfect but I'm still happy, when you're freehanding perfection doesn't happen but that's the charm of it.

Blue: Nails Inc - The Tide Is High
Pink: The Face Shop - Strawberry Milk Yogurt
Rainbow triangles (in rainbow order): M&S - Poppy, OPI - Where Did Suzi's Man-go?, Essie - Fear Or Desire, Rimmel - Bee A Honey, Barry M - Pole Position, Barry M - Kiwi, OPI - Jade Is The New Black, Barry M - Malibu, Barry M - Prickly Pear, Orly - Frolic (my current favourite), Barry M - Miami, OPI - Charged Up Cherry and Rimmel - Black Pearl

Thank you for reading and I hope you have a great day!! :)

Friday, 16 October 2015

Blue Leopard Nails

Hi yousens!! 600 posts, what?? I've made it that far?? Cool. There's been a lot of nail art round these parts as I've swatched all my polish (well until I get new polish but you'll know when that happens). That's a good thing as I like to think this as a nail polish blog, out of those 600 posts a good ole chunk is nail art. Leopard nails used to be a constant thing round here until I forced myself to do less and now I barely do leopard. But I think this is a really interesting one, and I love the colour scheme of this design. This was inspired by Base Coat Top Coat who does some really sweet nail art.

It's a simple leopard print with a leopard face, the closest to realism I'm ever going to get. I'm happy with how this look all turned out, super cute.

I started with the black outline for the face and for the spots I did splodges with the brushes then outlined them, standard leopard style.

Light blue: The Face Shop - BL601 and Models Own - Indian Ocean
Blue: Barry M - Malibu
Purple: Orly - Frolic
Teal: Essie - Naughty Nautical
Black: Rimmel - Black Pearl
White: Barry M - Cotton

Thank you for reading and I hope you have a lovely day!! :)

Wednesday, 14 October 2015

The Lady and the Tramp Nail Art

Hello there guys!! I hope you're doing well. I've been good here, My school's formal (or "prom") is coming up and the hype is real I am excited. I'll show you guys my nails for that shindig (that's a hilarious word). Also my school's concert and prize day, which I won the prize for Geography which is cool. Today's nail art is really cute, I'm so happy with this one :)

I wanted to recreate the spaghetti scene with the Bella Notte (such a nice song) for this design. The first time I watched this film was actually earlier this year. And it's super lovely, who doesn't love classic Disney? So there's Tramp and Lady, I decided against the outline and I'm actually really happy I did cause I think it looks really good. Lady is generally an adorable dog, I love the colour of her collar, I needed to add it to this design.

I started with the bases and added the colours one by one. I was surprised at how well I could proportion cause it's hit and miss thing for me. Then I added my black details which completes the look. Awk they're cute. I also did a gradient cause night time and while it was subtle is turned out better than I thought (and in pictures).

Blues and glitter: H&M - Blue My Mind, Essie - Lots of Lux and Topshop - Razzmatazz
Black: Lovely Me:Ex - Black
White: Barry M - Cotton
Grey: Barry M - Chai
Light brown: Nails Inc - Sao Paulo Streets
Brown: w7 - Brownie
Pink: Barry M - Miami
Yellow: Rimmel - Bee A Honey
Copper: Paris Collection - Copper Topper
Peach: w7 - Linen
Aqua: Barry M - Greenberry
Mustard: Topshop - Naked

Thank you very much for reading and I hope you have a great day!! :)